Adobe Photoshop Photography Tutorials
Whether you’re a photographer looking to improve your technique, or a designer looking to add more dimension and style to your designs, we have you covered. Here is a quick list of some Photoshop tutorials to get you started.
Introduction to Photography and Photoshop
Photoshop is a powerful tool for editing photos. In this tutorial, we’ll cover topics such as cropping and correcting images, adding effects, and creating beautiful portraits. Whether you’re just starting out or you’ve been using Photoshop for years, these tutorials will help you take your photography to the next level.
Photography Essentials
Photography is all about capturing a moment in time and preserving it for others to enjoy. However, learning how to take great photos can be challenging. Thankfully, Adobe Photoshop is an excellent tool for creating beautiful images. In this blog section, we’ll provide beginner-friendly tutorials on how to take great photos with Adobe Photoshop.
First, let’s start with some basic photo tips. To take good photos, you need to have good light and composition. Next, learn how to use the filters in Adobe Photoshop to create interesting effects. And lastly, learn how to adjust the brightness, contrast, and saturation of your photos to create the perfect image.
Lightroom Basics
If you’re just starting out with photography, or you’re a veteran photographer looking for new tips and tricks, check out our blog section for Adobe Photoshop Photography Tutorials. Here you’ll find step-by-step guides for everything from basic photo editing to more advanced techniques. In addition, we frequently feature guest bloggers who will share their own tips and tricks for using Photoshop in specific ways. So whether you’re a beginner or an experienced photographer, be sure to check out our blog section for Adobe Photoshop Photography Tutorials.
Basic Editing Tools
One of the most commonly used tools in Adobe Photoshop is the Edit menu. This menu provides access to a variety of basic editing tasks, such as cropping, resizing, and rotating images. Here are a few tutorials that will show you how to use these tools, in particular:
– Cropping an Image: Learn how to crop an image using the Edit Menu’s Crop tool.
– Resizing an Image: Learn how to resize an image using the Edit Menu’s resize tool.
– Rotating an Image: Learn how to rotate an image using the Edit Menu’s Rotate tool.
– Creating and enhancing different types of backgrounds.
Backgrounds, in the world of Photoshop, refer to all those things that lie behind your images, including scenery, textures, and even textures that are ‘painted’ on top of other images.
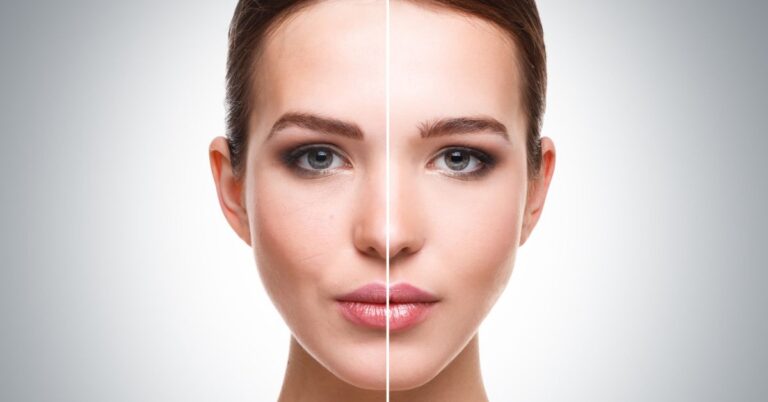
Color Correction
In this tutorial, we are going to learn how to correct color in Adobe Photoshop. By correcting color, we can make objects look more accurate and natural. We will use the Cmd+U (command + U on a Mac) shortcut to adjust colors.
First, let’s take a look at the image that we are going to correct.
The image has a lot of red in it, which is not accurate. To start correcting the color, we first need to select the red areas of the image. To do this, use the Cmd+A (command + A on a Mac) shortcut and click on each area that you want to select.
Next, we need to adjust the colors of each area. To do this, use the Cmd+U (command + U on a Mac) shortcut and click on the color wheel icon next to each area. This will open up the Color palette.
To adjust the colors, we first need to find the color that we want to change. To do this, click on the name of the color in the palette and then click on the color that you want to change it to.
After you have selected the color, make sure that the Brightness is at 100% and the Contrast is at zero. The other control in the palette is called Saturation. This adjustment works best when you use it right next to, instead of next to each other. Click on this button, and then click on the color that you want to change it to. Finally, click OK and repeat this process for each area that you have selected. This should fix any issues with colors in your image.
If you still have problems with colors remaining after making these adjustments, then there could be more complex issues with your image that need more attention from an image editing specialist. True color image editing is a very specialized, deep subject. It requires a combination of knowledge and artistic ability, but there are many good websites that can help you to become more knowledgeable in this field, like Adobe and Corel.
Contact an image editor at your local imaging center as soon as possible for assistance. If you have trouble finding an editing specialist near you, then consider getting one online. Many online services have been created over the last several years which allow professional photographers and hobbyists alike to get their images edited without having to visit a local store or imaging center.
Two Tips for Awesome Photos
If you’re anything like me, you probably take a lot of photos and you want to make them look their best. In this Adobe Photoshop Photography Tutorials post, I’ll show you two tips that will help make your photos look amazing.
The first tip is to use the levels command to brighten or darken areas of your photo. You can use levels to adjust the brightness, contrast, and saturation of an image. For example, if you want to darken an area in your photo, you would use the levels command and click on the Blacks slider button. If you want to brighten an area, you would click on the Whites slider button.
The second tip is to use the crop tool. The crop tool helps you resize your photo without losing any of the original content. To use the crop tool, first, select it by clicking on the Crop Tool icon located in the toolbar at the bottom of your screen. Then, use the mouse cursor to draw a rectangle around the part of your photo that you want to keep. Finally, press Enter or Click on the crop tool icon again to copy the selected area onto your clipboard. You can then paste it onto another photo or document.
Conclusion
Adobe Photoshop is one of the most commonly used photo editing programs in the world, and for good reason. It has a wide range of tools and features that enable you to manipulate your photos in ways that simply weren’t possible before. Whether you are a beginner looking to learn some basic techniques or an experienced photographer who wants to take your work to the next level, there are tutorials available on Adobe Photoshop that will suit your needs. So if you’re ever feeling lost or frustrated with your photography, give Adobe Photoshop a try – I’m sure you won’t be disappointed!